
Views: 0 Author: Site Editor Publish Time: 2026-08-05 Origin: Site


Watching a toddler transition from walking to riding brings both excitement and anxiety. You want to support their developmental milestones safely. You also need to respect your household budget. Unfortunately, the current toddler bicycle market feels heavily saturated. Brands frequently label models for "ages 2-5" without nuance. These one-size-fits-all options often prove completely incompatible for a 24-month-old's tiny proportions. A heavy frame will easily overwhelm a smaller rider.
We offer an objective, measurement-first framework for evaluating these early riding options. You will learn how to strip away aggressive marketing fluff. Instead, we focus strictly on physical fit, total vehicle weight, and reliable safety standards. By the end, you will know exactly what to look for before making a purchase. This careful approach prevents early frustration and ensures immediate joy for your child.
Weight is the ultimate dealbreaker: A toddler's bike must not exceed 30% of their total body weight.
Seat height > wheel size: A 2-year-old needs a minimum seat height approximately 1–1.5 inches lower than their exact inseam measurement.
Brakes are secondary at this age: 2-year-olds lack the cognitive mapping and hand strength for handbrakes; foot-stopping is the default.
Tire material defines use case: EVA foam is optimal for indoor/flat pavement and weight reduction; pneumatic (air) tires are for uneven, outdoor terrain.
Understanding toddler development requires looking at basic physics. Balance and steering are foundational motor skills. Pedaling is a secondary mechanical skill. When you separate these tasks, children learn much faster. Toddlers naturally use their feet for stability. Balance Bikes capitalize on this instinct perfectly. They allow children to glide securely across the floor.
Beware the traditional tricycle or training wheel trap. Three-contact-point vehicles feel safe initially. However, they train kids to shift their body weight incorrectly. Riders learn to lean away from turns to stay upright. A two-wheeled vehicle requires leaning into the turn. Breaking this bad habit later causes immense frustration. It delays proper riding mechanics significantly.
Long-term adoption data strongly supports this early approach. Starting on two wheels reduces future transition times immensely. Your child will eventually graduate to a standard pedal Kids Bike. When they already understand core balance, you just add pedals. The transition often takes a few minutes instead of weeks. They already know how to steer and lean. The only new task is rotating their legs.
Many parents worry about safety on two wheels. However, toddlers remain much closer to the ground this way. They can drop their feet instantly if they feel unsteady. This immediate foot-down capability builds deep self-confidence. They control their speed naturally without relying on complex brakes.
You must evaluate sizing based on physical reality. Manufacturer age ranges are frequently misleading. A two-year-old generally weighs between 25 and 30 pounds. The 30% weight rule is your ultimate guide here. The vehicle must weigh under nine pounds total. Ideally, aim for a crisp six to seven pounds. Heavier frames create immediate tipping hazards. They also cause unnecessary physical fatigue.
Seat height matters much more than wheel size. Your child needs a minimum seat height lower than their inseam. A gap of one to one-and-a-half inches is absolutely perfect. This allows them to plant both feet flat securely. They can bend their knees slightly to push off properly. If they are on their tiptoes, they cannot generate forward momentum.
Follow this actionable method to measure your toddler's inseam accurately:
Have your child stand against a flat wall barefoot.
Place a hardback book between their upper legs.
Slide the book up gently until it meets their crotch.
Ensure the book top remains perfectly parallel to the floor.
Measure the precise distance from the book top to the floor.
Frame geometry also demands your attention. Look for a step-through frame design specifically. Short legs must mount and dismount without tripping. High top tubes cause clumsy falls and discourage practice. A low center of gravity provides a much safer riding experience.
Consider the Q-factor and heel clearance as well. The Q-factor measures the width between the pedals on adult bicycles. On these early models, it refers to the rear frame width. The chainstays must remain narrow enough for tiny strides. Wide frames cause toddlers to hit their heels repeatedly. This ruins their stride and causes unnecessary ankle pain. Narrow rear designs prevent this frustrating interference completely.
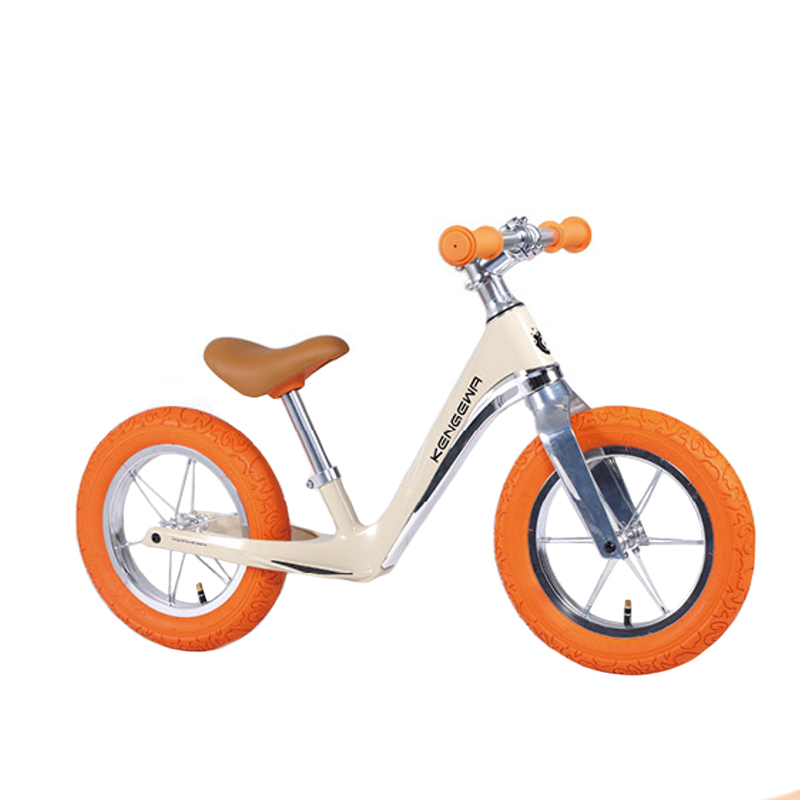
Selecting the right materials determines the overall riding experience. The tires and frame dictate weight and functionality. You must match these components to your specific environment. A mismatch here ruins the initial learning phase.
Tires define the primary use case for your toddler. EVA foam tires are puncture-proof and ultra-lightweight. They are ideal for beginners, indoor use, and smooth driveways. We highly recommend EVA foam for most two-year-olds. They eliminate flat tires and keep the total weight incredibly low. Pneumatic air tires provide superior traction for gravel or grass. However, they weigh more and require regular air pressure maintenance.
Frame materials force a choice between longevity and weight. Aluminum serves as the premium choice here. It remains rust-proof, highly durable, and very lightweight. Steel is highly durable and highly cost-effective. However, steel frames often weigh too much for young toddlers. Wood offers an eco-friendly and visually appealing alternative. Unfortunately, wooden frames offer limited adjustability. They also degrade quickly if left outdoors accidentally.
Table: Frame Material Comparison Guide
Material Type | Weight Class | Durability Level | Best For |
|---|---|---|---|
Aluminum | Ultra-Lightweight | High (Rust-proof) | Small beginners, long-term use |
Steel | Heavy | Very High | Aggressive riders, strict budgets |
Wood | Moderate | Medium (Weather-sensitive) | Indoor use, eco-conscious buyers |
Steering limiters introduce an interesting industry debate. These mechanisms prevent the handlebars from spinning a full 360 degrees. Limiters prevent jackknifing and sharp turns for absolute beginners. This keeps early riders much safer during their initial learning phase. However, limiters restrict advanced maneuvering as your child grows. A removable steering limiter offers the best of both worlds. You can detach it once they master their cornering skills.
Handbrakes present another component reality. Two-year-olds lack the hand strength to squeeze a brake lever. They also lack the cognitive mapping to use it during emergencies. Their default reaction is always to drag their feet. Do not pay extra for handbrakes at this age. They add unnecessary weight and complexity.
Parents often buy models slightly too large deliberately. They hope the child will eventually grow into it. This "growing into it" fallacy guarantees immediate rejection. A bulky frame creates fear and a total lack of control. Toddlers will simply walk away from something they cannot manage. Fit the vehicle to their current size, not their future size.
Your introduction environment plays a massive role in early success. Starting on uneven grass or steep hills introduces unnecessary risk. Bumps and slopes overwhelm a beginner's developing motor skills. Introduce the new vehicle indoors on a flat carpet first. Alternatively, use a highly controlled, flat driveway. Let them walk over the frame before expecting any real gliding.
The helmet battle must begin on day one. You must couple the initial introduction with immediate helmet adoption. Establish this as a completely non-negotiable safety habit. Do not let them straddle the seat without wearing one. Consistent rules prevent arguments and ensure long-term safety compliance.
Beware of common introduction mistakes. Pushing the child physically is a terrible idea. Never hold the handlebars for them while they ride. This disrupts their natural center of gravity. It prevents them from learning how the vehicle reacts to their movements. Let them support their own weight entirely.
Keep the first sessions under fifteen minutes to prevent fatigue.
Praise their balancing efforts rather than their speed.
Model the striding motion yourself if they seem confused.
Store the vehicle in a highly visible, accessible play area.
You are now ready to make an informed choice. Divide your options based on your child's personality and environment. This logic simplifies the final purchasing process immensely. It prevents analysis paralysis.
Scenario A fits the cautious indoor or driveway beginner. Your priority here is building confidence through extreme ease of use. Focus on an ultra-low minimum seat height under 11 inches. Prioritize EVA foam tires to keep the weight down. Select an aluminum frame to ensure easy handling. Target a total weight strictly under seven pounds. This setup ensures they never feel intimidated.
Scenario B suits the tall, aggressive outdoor rider. This child is physically larger and eager to explore nature. Focus on pneumatic tires for superior grip on grass and dirt. Consider an optional handbrake for future-proofing their skills. Look for a slightly wider wheelbase for added stability over bumps. Ensure the frame can handle rougher neighborhood terrain without bending.
Always evaluate overall value against the expected lifespan. Factor in the seat and handlebar adjustability ranges carefully. Will this specific model serve one child for eighteen months? Or do you plan to hand it down to younger siblings? Highly adjustable models cost more initially but offer better longevity. Quick-release seat clamps are highly recommended for fast adjustments.
Finally, verify compliance and brand trust. Look for verifiable safety certifications before you buy. Check for CPSC certification if you reside in the US market. Look for CE or EN71 compliance in Europe. Always verify the manufacturer uses strict non-toxic paint standards. Toddlers often chew on handlebars, so material safety is paramount.
The best option for a two-year-old is never the most expensive. It is the one fitting their current inseam and weight perfectly. Prioritize a lightweight frame and a low standover height. Avoid the temptation to buy a larger size for future use. A properly fitted vehicle builds immediate confidence and joy.
Your child will develop crucial motor skills at their own pace. Respect their learning curve by providing the right physical tool. When they transition to pedals later, you will see the immense payoff. They will skip training wheels entirely.
Your next step action is simple. Grab a standard tape measure right now. Find your child's exact inseam using the book method described above. Filter your final shortlist strictly by those specific numbers. You will guarantee a successful and safe riding experience.
A: Yes. Many 24-month-olds can ride them successfully. At this age, they begin by simply walking while straddling the frame. As their confidence grows, they learn to sit and glide. The key is ensuring the vehicle is lightweight enough for them to handle.
A: Have them stand barefoot against a wall. Place a hardback book between their legs and slide it up gently to their crotch. Keep the book level. Measure the distance straight from the top of the book down to the floor.
A: No. Two-year-olds lack both the grip strength and cognitive mapping required to use handbrakes effectively. Their natural instinct is to drag their feet to stop. Adding a handbrake at this stage only adds unnecessary weight and complexity.
A: A standard 12-inch model typically lasts about 18 to 24 months. It depends heavily on the child's growth rate and the seat post's adjustability. Once their inseam exceeds the maximum seat height, they need an upgrade.
A: This is perfectly normal. Walking while straddling is the critical first stage of learning. They are getting comfortable with the vehicle's weight and steering. Do not push them to glide. They will naturally pick up their feet once they feel balanced.


